Post tickers is the continuously moving display of the post in the loop. This section is the part of header and is majorly kept just below the primary menu. Post Tickers are very important section of your website for you to showcase your major post or other contents.
To configure your Post tickers
- Go to your WordPress dashboard, then go to Appearance >> Customize >> Header Settings >> Post Tickers
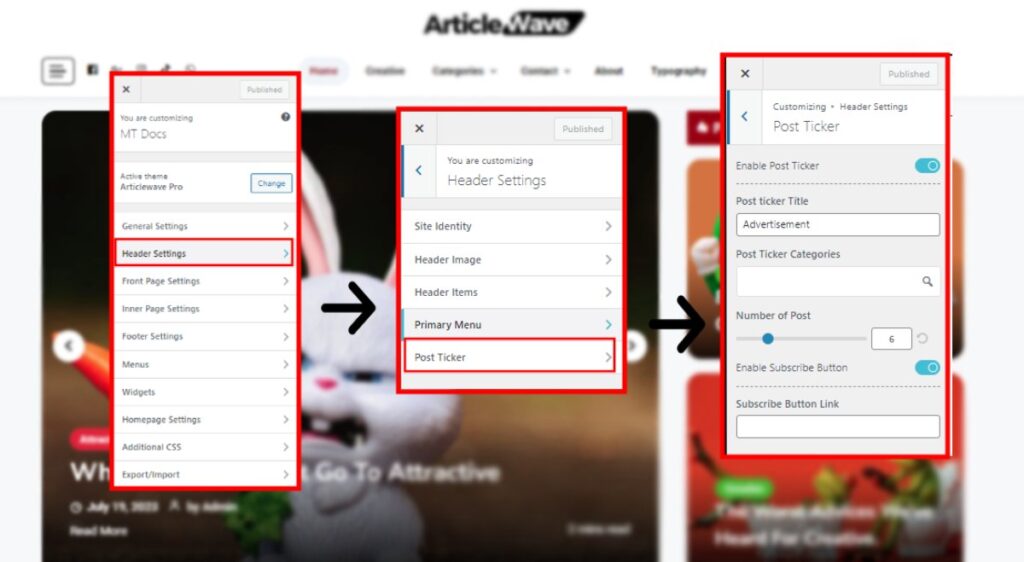
- Foremost, toggle on the “Enable Post Ticker” to customize the Post ticker.
- In the text area below “Post ticker Title” choose your preferred name for your post ticker.
- You can also select the specific categories to display in post ticker, just select the categories from the box or search for it to display.
- Choose the number of post that you want to display in the ticker using the slider or entering the number in the small box beside the slider.
- You can also reset to default number of post by clicking the “reset” button beside the small box.
- Toggle on or off “Enable Subscribe Button” to enable or disable subscribe button in your post ticker.
- Add a link in the text area below for your subscribe button to redirect to your subscription page.
- Click on “Publish” to save your changes and publish it in your website.