The menu is used to build site navigation that helps the visitors to navigate inside the website. The menu section lets you create, edit, and assign navigation menus, which can be done in two simple ways. Either by configuring menu settings from the admin dashboard or from the theme customizer.
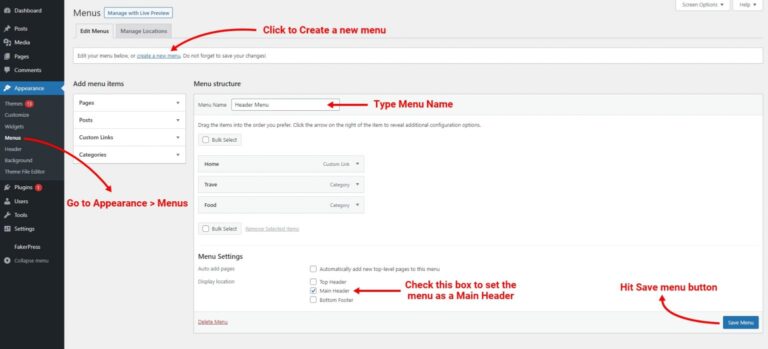
To configure menu panel from admin dashboard:
- Start from navigation to the WordPress Dashboard.
- Then head to Appearance >> Menus from the sidebar.
- Under the Edit Menus tab, click on create a New Menu.
- Enter your Menu Name in the menu name input field.
- Under Menu Settings, check one display location amongst the available locations.
- At the end, click on Create Menu.
To configure menu panel from Theme Customizer:
- Start from WordPress dashboard by navigating to Appearance >> Customize.
- Select Menus options to open the Menu settings interface.
- Click on Create New Menu link.
- First enter your Menu name in the Menu Name Box and then set a location for that menu but skip it if you want to use a menu widget.
- Then, click on the Next button.
- Click on the Add Items under Menu Name section.
- You can then Add Menu items for your newly created menu from the array of options which are Custom Links, Pages, Posts, Categories and Tags.
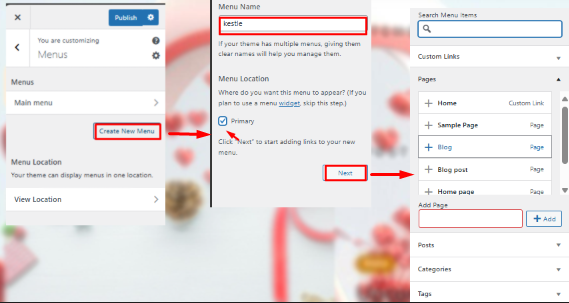
- Expand any of your preferred panels and click on the + icon to add them to the menu.
- At last save the changes by clicking Publish button.