Here you can enable various options for your main header area. Including necessary functions like site mode switcher, search icons, header sticky, and social icons.
To enable them,
- Go to your WordPress dashboard, then select the Appearance > Customize
- Then click the Header Settings and go to the Main Area options.
- There you will find four unique toggling options from which you can enable the different functionalities in your site.
- Similarly, enable them, like the site mode switcher, search icons, header sticky, and social icons, as per your preferences.
- At last check the live preview to showcase the recent change that you have done. After that, save it by clicking the Publish button.
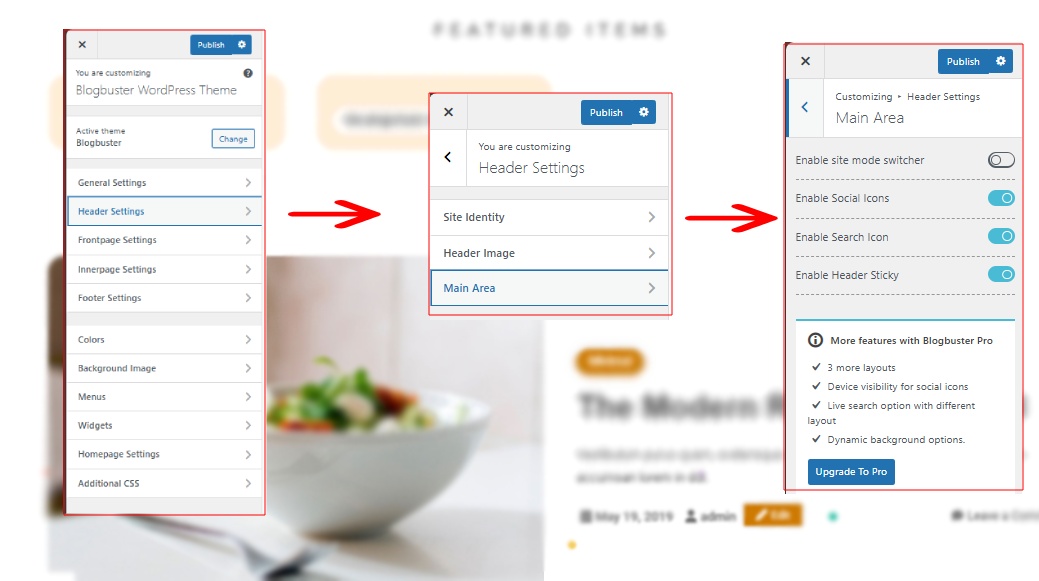
The Premium version of Blogbuster enable additional options for you to utilize for your main header area
In Blogbuster Pro, you’ll get:
- Three more layout options for the section
- Device Visibility options for Social Icons, if enabled
- Live Search Option with different layouts
- Dynamic Background Options
Enable Live Search in your website
With Blogbuster Pro, you can enable Live Search option to strengthen your navigation and user experience for your website.
- Go to Header Settings and look for Search Options in the lower part of the General Tab.
- Click on the upper drop-down menu to choose your search option, Default or Live Search
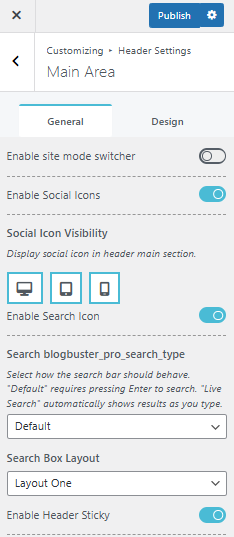
“Default” requires pressing Enter to search. “Live Search” automatically shows results as you type.
- Choose your preferred layout from the lower Search Box Layout drop-down menu for the search box
Layout One: A Search Page popup will be shown when user clicks the search icon
Layout Two: Search Page will be show just below where the search icon is added, generally on the top right side of the screen.
- Click on Publish button on the customizer to publish your changes