The Archive Pages in Blogbuster display the changes in the Archive Page Style and read more text.
To see the changes,
- Navigate to Innerpage Settings → Archive Pages
- Then click the Archive Page Style box and choose the listed three page styles: Grid, Classic, or List.
- If you Enable archieve page title title prefix on. It will add a little label (for example, “Category: ” or “Tag: ”) automatically before each post’s title.
- Similarly, if you Enable Read More Button on. It will append a “Read More” link or button after the excerpt of each list item using whatever you type into “Read More Text“.
- You can also choose your pagination by clicking the drop-down menu under the Pagination Type text, if you refer different paginations.
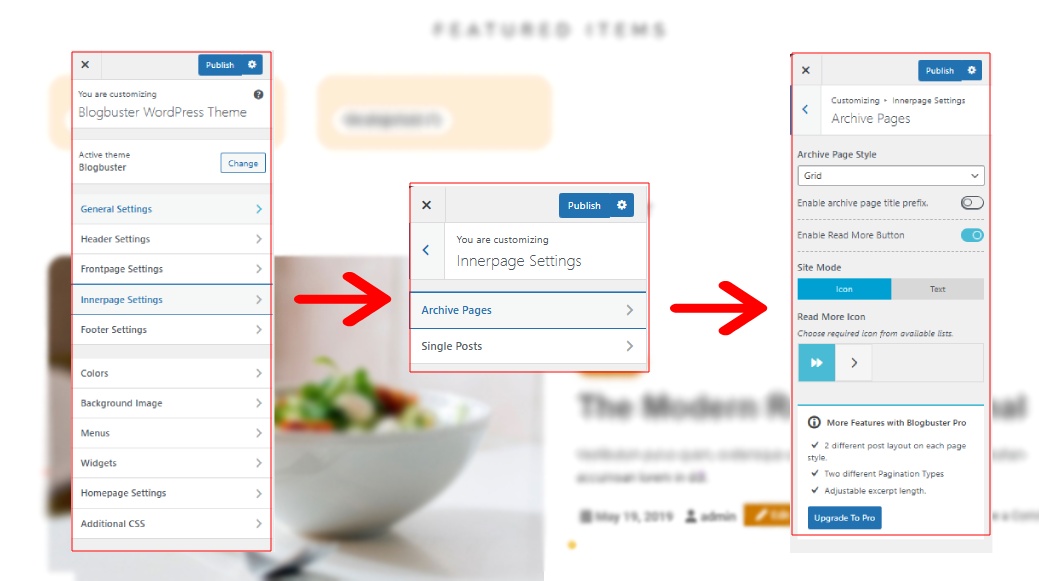
Blogbuster Pro features many more features to perfectly customize your Archive pages.
- 2 Different Post Layouts for each page styles
- Different Pagination Styles
- Adjustable Excerpt Length
- More ‘Read More’ Icon options
Design your Archive Pages
Blogbuster Pro allows you to customize your Archive pages and decorate them with various layouts and page styles.
- Head to Design Tab in Archive Page Settings, and select your page style.
Keep in mind that every Page Layout for the archive page has two different Post Layout and will appear once you select one of them automatically.
- Choose your Post Style for the selected Page Layout

- Click on Publish button to save your changes.