You can enable various options for your main header area. Including necessary functions like site mode switcher, search icons, header sticky, and custom buttons.
To enable them,
- Go to your WordPress dashboard, then select the Appearance → Customize
- Then click the Header Settings and go to the Main Area options.
- There you will find four unique toggling options from which you can enable the different functionalities in your site.
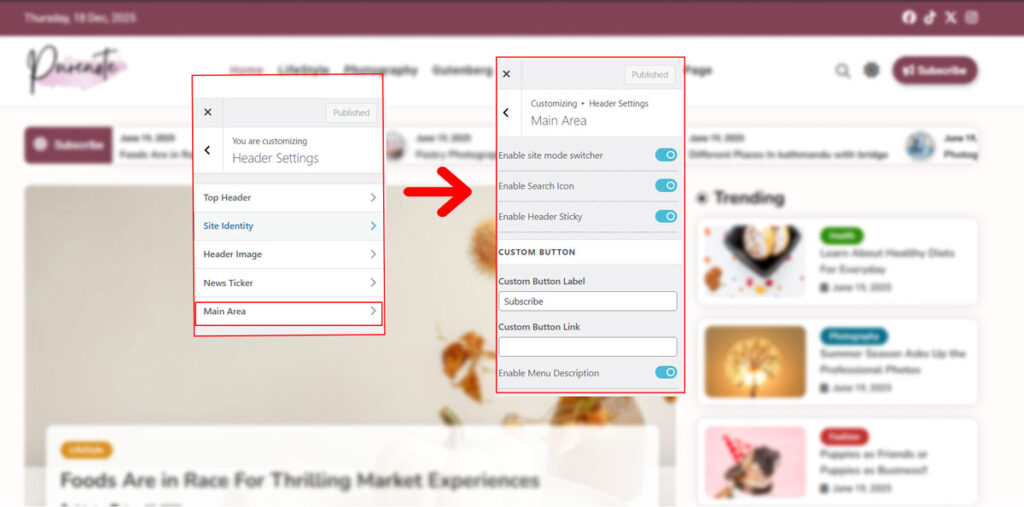
- Similarly, enable them, like the:
- Site mode switcher: Enables features to change site into light or dark mode.
- Search icons: Allows user to click on it to search for resources within the website.
- Header sticky: Sticks the header to the top of the screen, even if the screen is being scrolled.
- Menu Description: Describes the purpose of the elements in the Navigation menu.
- Choose Search Method from the given options in the drop-down menu
- Custom Button section allows you to add your own personalized button to the Main Header Area with its own label and link.
- Select your Desired button from the given option
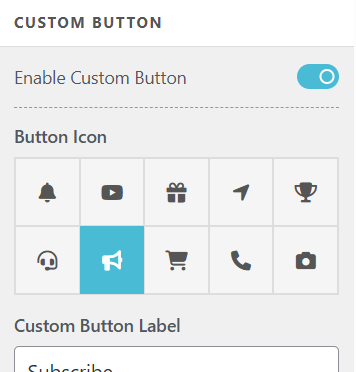
- Simply, add label to Upper text box and link to lower to enable your Custom Button on header.
Design your Header Main Area with Purenote Pro
You can now fully design your Header Main Area with multiple layout options, background options and text colors.
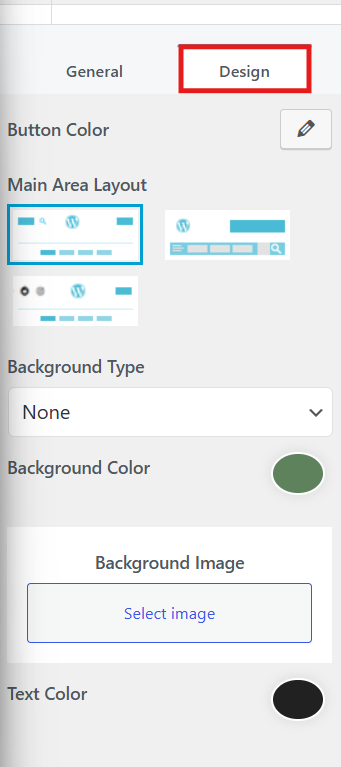
- Simply go to your Design tab, then select appropriate layout for your header main area.
- Then choose the type of Background you want; Color, Image or None and select or add the respective resources as per your choice
- Select the proper text color as per your design.
- At last check the live preview to showcase the recent change that you have done. After that, save it by clicking the Publish button.