This feature is available on Purenote Pro only. Purchase the Premium edition of Purenote to get access to this feature.
Purenote Pro allows you to customize your Bottom Fullwidth enhancing your website with more sections like Ad Block, Blog Carousel and other custom blocks.
- Go to WordPress Dashboard and then to Appearance → Customize, then look for Frontpage Settings in Purenote Pro
- Select the ‘Bottom Fullwidth‘ option from the given options.
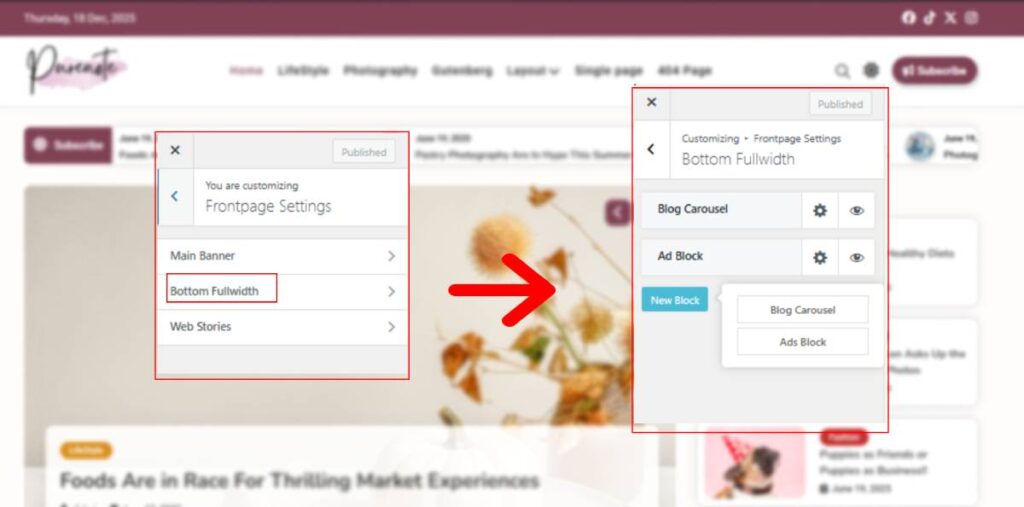
There are two types of blocks or section that you can add in your Bottom Fullwidth: Blog Carousel and Ad Block.
Customizing Blog Carousel
- In Bottom Fullwidth section, click on the ‘Gear Icon‘ beside the text Blog Carousel to edit it.
- Click on the text box below the Block Title to add title to the block and provide description just below Block Description.
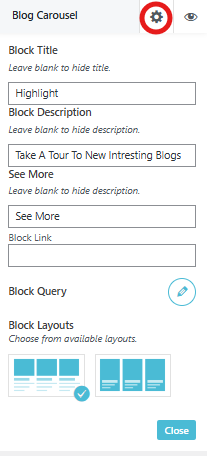
- There’s a option for custom labeling ‘See More‘ option, leave it out if you don’t want the change
- Block Query option allows you to sort the types of posts you want for your Blog carousel. Choose categories, choose their order, filter their dates and adjust their number in Blog Carousel from this section.
- Choose one of the two different layouts available for the section.
Customizing Ad Bock
Ad Block enables you to add advertisements in the Bottom Fullwidth section of your website.
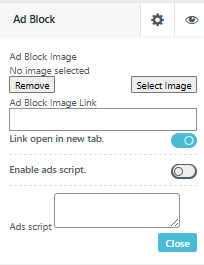
- As similar to Blog Carousel, click on the Gear Icon, and add Image to your Ad Carousel by clicking on the Select Image option at the right side.
- Give your image the link of your advertisement and Toggle on the option below it, if you want that link to open in new tab of the browser.
- Enhance your advertisement section with Ad Script, by enabling it and adding script in below the text box.
New Block enables you to add either Blog Carousel or Ad Block. Select one of them for more addition and customize as instructed as above.