There are two simple ways to access and configure Menu settings. You can either configure menu settings from the admin dashboard itself or from the theme customizer.
Configure Menus using WordPress Admin Dashboard itself
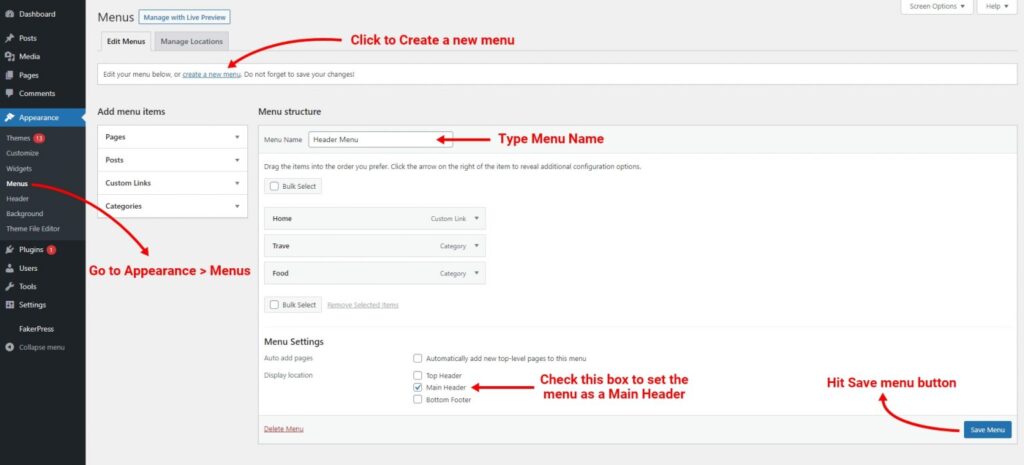
- First open you WordPress Dashboard
- Navigate to Appearance >> Menus from the sidebar.
- Under Edit Menus tab, click on Create a New Menu.
- Enter your menu name in the Menu Name input field.
- Under Menu Settings, check one display location amongst the available locations.
- Eventually, click on Save Menu to save the changes.
Configure Menu Settings Using Theme Customizer
- First open your WordPress dashboard.
- Open your theme customizer by navigating to Appearance >> Customize.
- Select Menus options to open the Menu settings interface.
- Click on Create New Menu link to create a new menu.
- First, enter your menu name in the Menu Name Input field, and then set a location for that menu to either the top header, Primary or footer by checking one box.
- Then, click on the Next button below.
- Click on Add Items under the Menu Name section.
- You can then Add Menu items for your newly created menu from the array of options which are Custom Links, Pages, Posts, Categories and Tags.
- Expand any of your preferred panels and click on the + icon to add them to the menu.
- You can also reorder menus to create a drop-down effect by clicking on Re-order items. Use arrows to create a slight indentation to create drop-down menus.
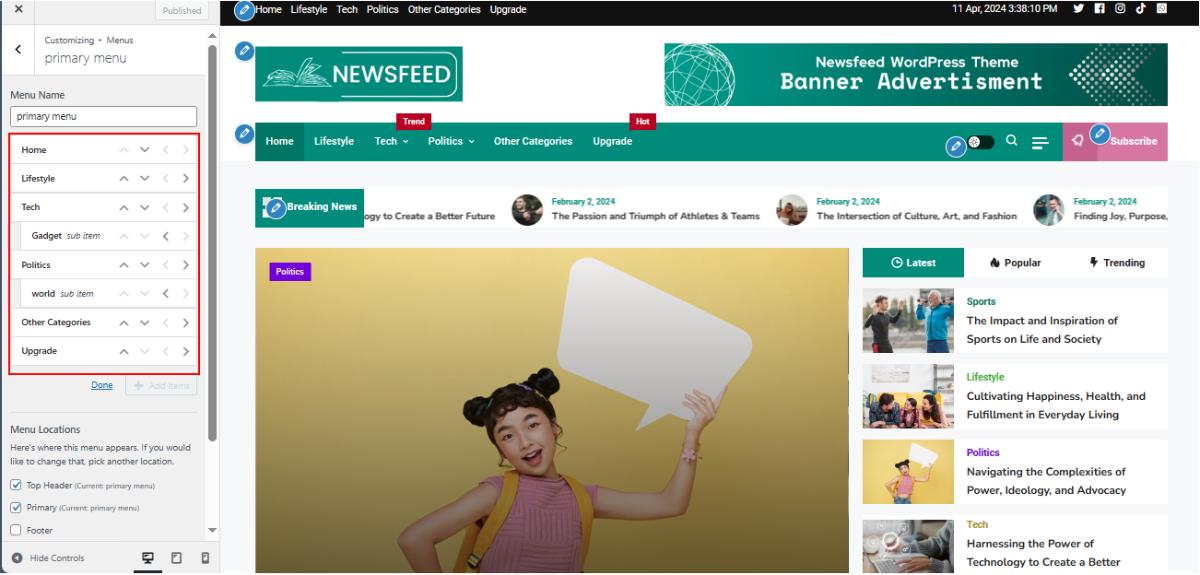
- Click on Publish to save the changes.