Configuration of your site’s menu from the WordPress Dashboard is relatively easy. You just have to know a few steps to create a functional menu.
- First, open your WordPress dashboard by logging in with your credentials.
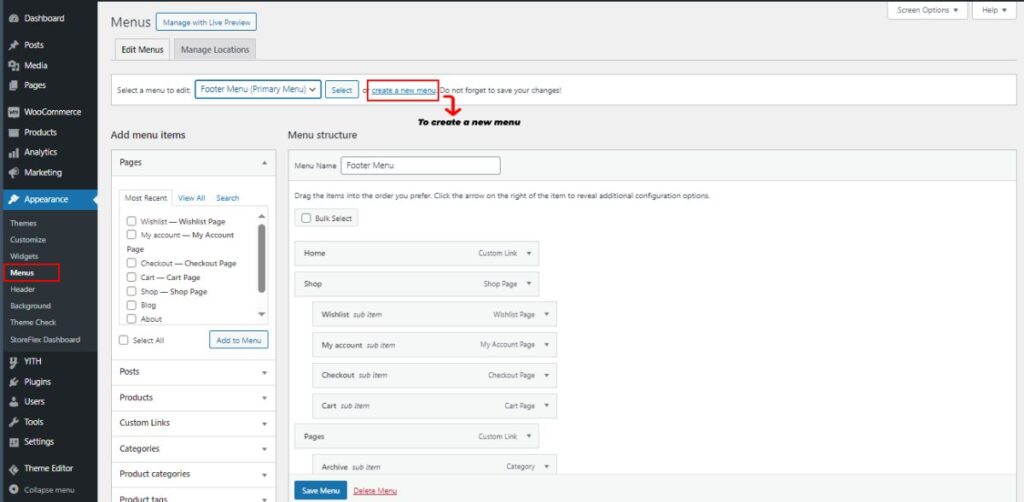
- Navigate to Appearance >> Menus from the sidebar.
- Under the Edit Menus tab, click on Create a New Menu.
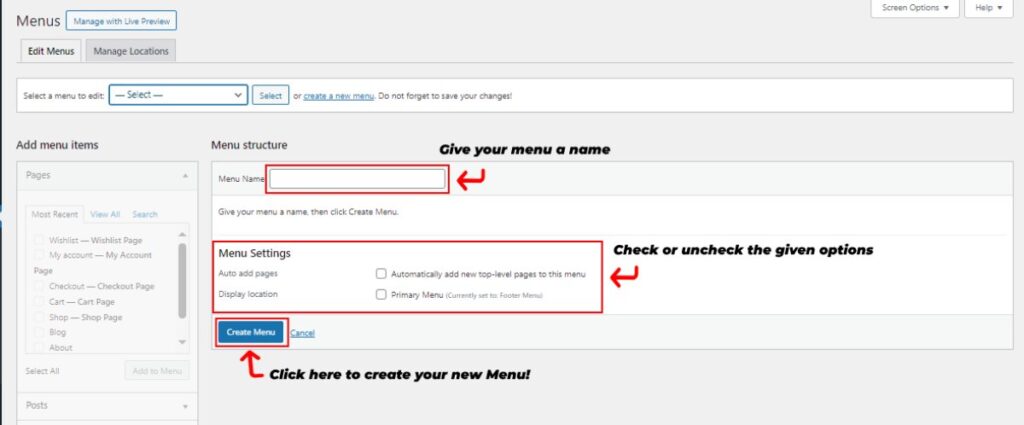
- Enter your menu name in the menu name input field.
- Under Menu Settings, check one display location amongst the available locations.
- Eventually, click on the Create Menu to save the changes and to be able to edit your new menu.
After you’ve created it, it’s time to add your elements to the menu.
- After you’ve created your menu, go to Edit Menu at the top of the screen.
- Then, select your preferred elements from the given options on the screen to either add pages, posts, categories, custom links, products, or any other given options to your menu.
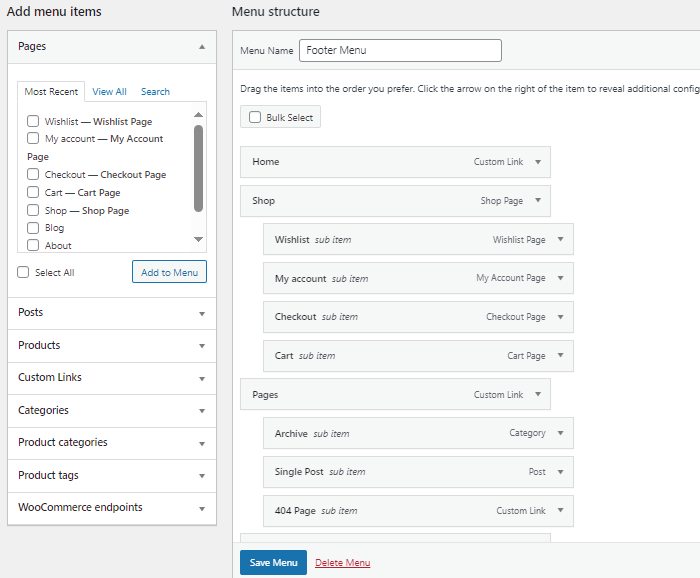
- Save your changes by clicking on the Save Menu button.
If you want a more thorough menu tutorial, then check out the blog: How to easily add Navigation menus on WordPress websites?