The header and all the other elements it consist of could be one of the most important aspects of any website. Some of the elements, such as the site identity, primary menu, social icons, site mode switches, etc., are some of the most important aspects of increasing the positive side of your SEO and user experience. For any online store, a cart option, information about the store (maybe opening and closing times), and account details are another integral aspect of the website.
Check out the video guidance for this section
In StoreFlex, you can easily customize site identity as per your preference.
For that,
- Login to your WordPress dashboard, then head for Appearance > Customize to go to your customizer.
- After you have reached the customizer, look for header settings in the given customizer on the left side of your screen (right for RTL websites).
- Then go to the Site Identity option, which is at the top of the list of options.
Site Title and Tagline
- If you want to give your site a title rather than logo (or want to use both) along with tagline, head to Site Title and Tagline section
- Select the text area below the site title text and add your preferred title to the site.
- For Tagline, just select the text box below the Tagline text and add your tagline
- If you don’t want to display the site title and tagline, just uncheck the Display Site Title and Tagline option below the tagline text area.

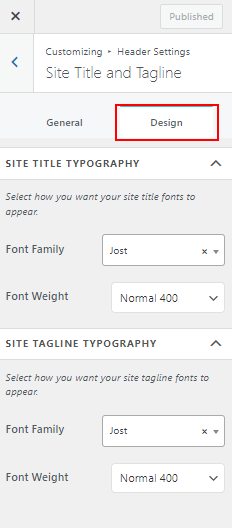
Design your Site Title and Tagline
To design your title and tagline’s typography, select the Design tab beside the General tab above the site title text.
- There are two sections for designing your site’s title and taglines: Font Family and Font Weight
- Choose fonts in the Font Family section from the given options and provide them with your preferred needs.
- Do the same for the Site Tagline Typography section.
Choose your logo!
- Go to the Logo and Site Icon section below.
- To add your logo to the header, choose the Select Logo button under logo.
- And then upload your logo (make sure you have it in your media files or hard drive).
- Adjust your logo’s width with the slider below Select Logo button
- Check if the logo is placed or not from the live preview
Favicon
A small icon that is shown in the tabs of your browser (also known as a site icon). It helps the user recognize that your website’s tab is open in their browser. Some of the users also recognize the site icon or favicon as a signal for the authenticity of the website. Therefore, it is wise to add site icon for your site
- Below the site title and tagline options, select the Select Site Icon button.
- Upload your favicon from your computer’s hard drive or media files. (Recommended size: 512 x 512 px)
After you are done with the customizations, make sure to publish your changes by clicking on the Publish button.