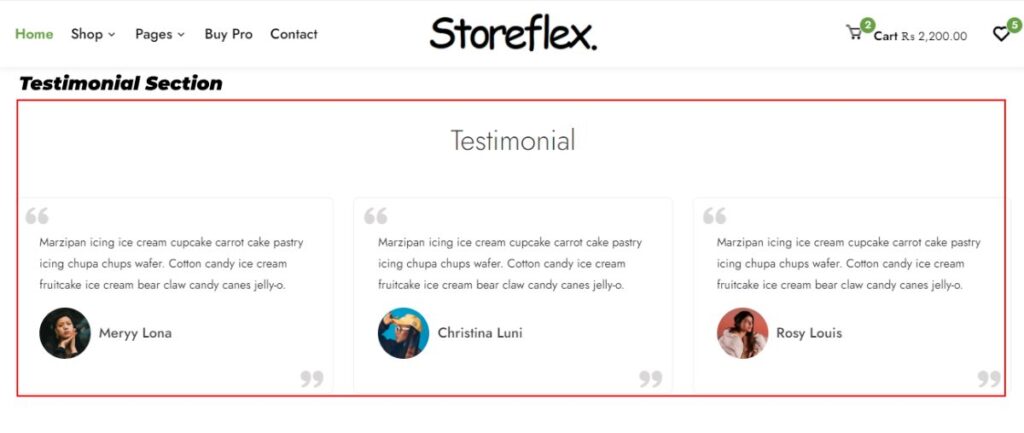
Testimonial sections provide assurance to your newly visiting customers about your products. Testimonials are user reviews that you display on your website to help newcomers understand the quality and authority of your services and products.
Video Tutorial
To utilize testimonial sections,
- Go to your WordPress Dashboard, then navigate yourself to Appearance > Customize
- Then again, reach out for Footer Settings and to the Testimonials section
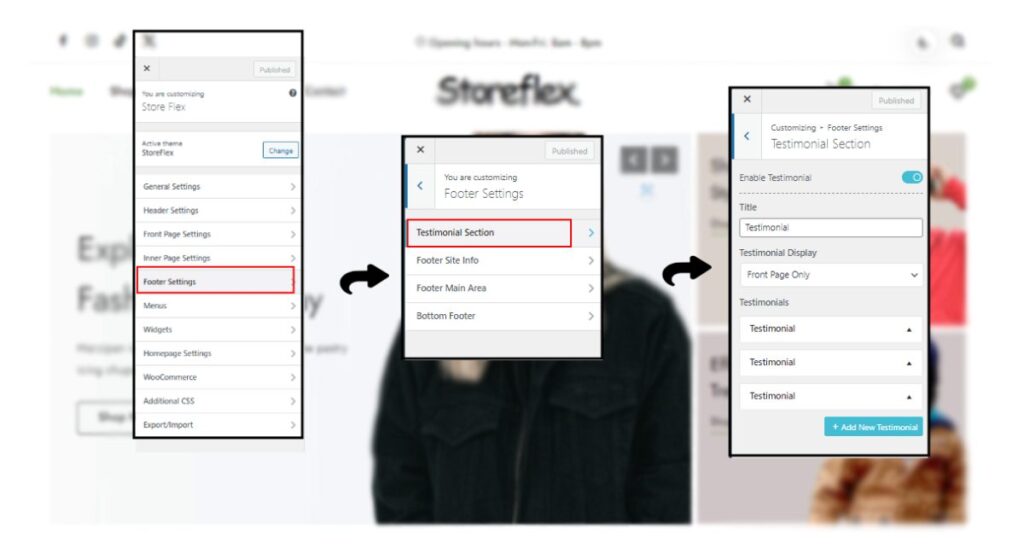
- First of all, enable your testimonial sections by clicking on the Enable Testimonial toggle option on the top of the customizer.
- Choose the menu from Testimonial Display to select where you want to display the testimonials (on the front page only or on all of your site’s pages).
- To edit your testimonials, go to the Testimonials section at the bottom of the customizer and select the drop-down menu.
- After the menu appears, choose the avatar image of your testifying person by clicking on the Select Image option.
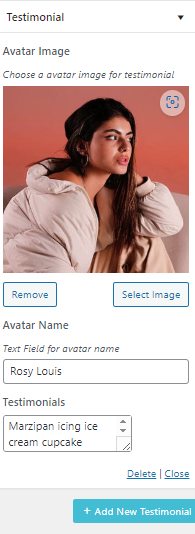
- Give your testifying person the name in the text area below the image selection area.
- Last but not least, add the testimony in the text section below the testimony text.
- Repeat the same process after clicking on the +Add New Testimonial button in the blue box just below.
(You can add up to six testimonials if you are using free version of the theme.)
- Save your changes after reviewing them by clicking on the Publish button.