With StoreFlex Pro, you can now further modify your online store’s shop settings with various settings like product display style and text fields. Furthermore, you can modify your product display with a sales ribbon, an out-of-stock display button, and more.
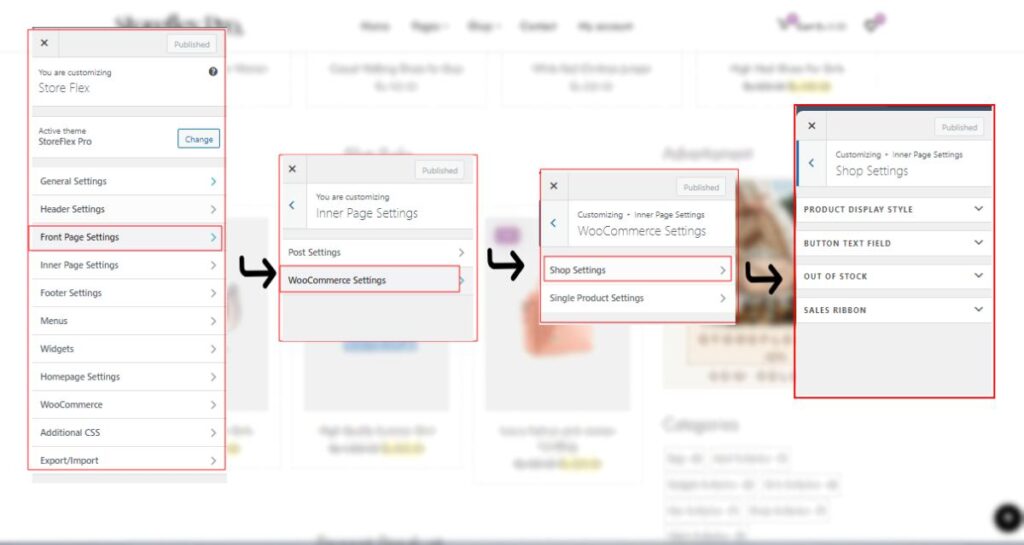
To customize your shop settings,
- Go to your WordPress dashboard and head to Appearance > Customize.
- Then navigate to Inner Page Settings > WooCommerce Settings > Shop Settings.
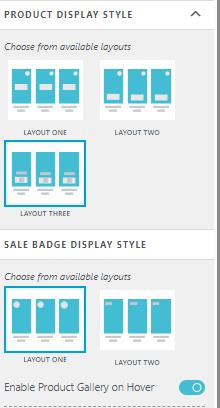
- Click on the product display option to customize it.
- Select your layouts for product display and sales badges from the given options.
- Enable or disable the product gallery on hover, as per your preferences.
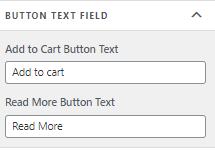
- For the button text, click on the Button text field option
- Name your “Add to Cart” and “Read More” button texts in the given input fields as per your desire.
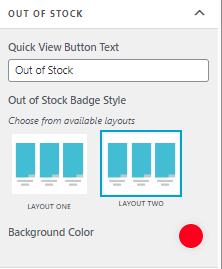
- If you want to label some of your items as out-of-stock, click on the out-of-stock option below the button text field option.
- Choose your layouts for the out-of-stock products.
- Select your preferred colors from the given palette.
To mark your product as out of stock, go to WordPress Dashboard > Product > Quick Edit (on your depleted product), then select the drop-down menu labeled “In Stock?” above the Update button.
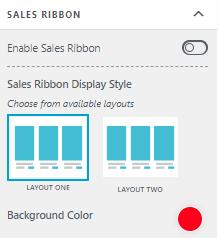
- To label your product as a sales item, click on the Sales Ribbon option.
- Enable your sales ribbon by turning on the toggle option at the top.
- Choose your layout for your ribbon and background color to match that.
- Save your changes by clicking on Publish after you’ve made your changes.