Social icons are one of the most important features in an online store. Because with social icons integrated into your store, you can properly engage with your customers and visitors, who are likely to become ones.
The free version of StoreFlex already has the feature to integrate social media icons into your site, but with the pro version, you can do more, like adjust the width of the icon and color options.
To customize your Social Icons with StoreFlex Pro,
- Go to your WordPress Dashboard and navigate to Appearance > Customize.
- Then go to General Settings in the customizer, then navigate yourself to Social Icons in the given options.
- Information regarding addition and removal of Social Icon has already been explained in StoreFlex’s documentation.
There is no limitation in the repeater field for the social icon in the pro version. You can use as much as you want, but using too much can lead to design disruptions. Be sure to add social icons with caution.
What are the new features in StoreFlex Pro for social icons?
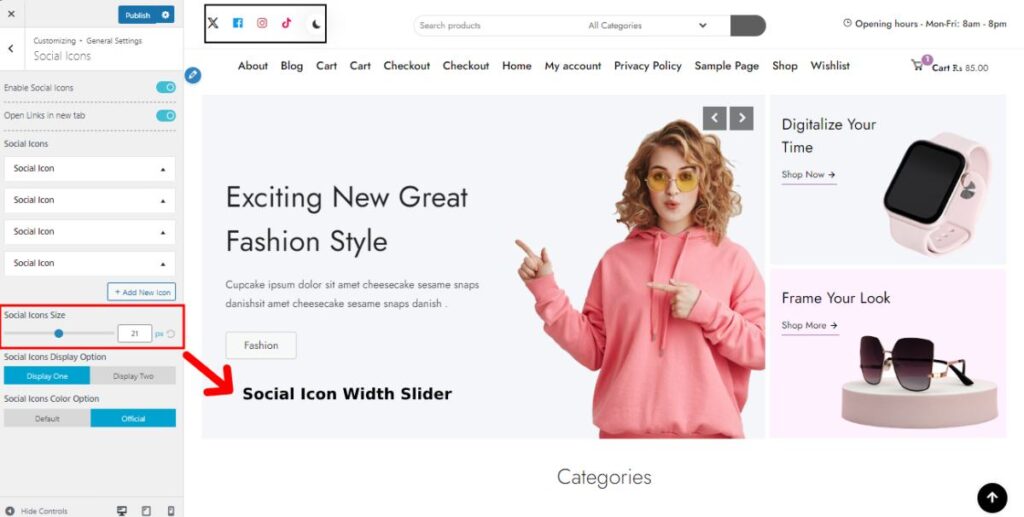
You can now adjust your social icon’s width with a slider in StoreFlex. This will help you set your own personalized size for the icons.

- Drag the slider to-and-fro as per your requirement, or use the box to adjust the size of your social icon.
- Click on the reset button beside the input field to set the width size to default.
Social Icon Display and Color Options in the StoreFlex Pro.
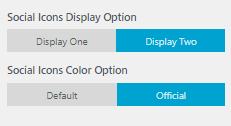
In StoreFlex Pro, you now have multiple display options to showcase on your site. You can also choose a personalized color for your icons with the color customizer option.
- Look for Social Icon Display option in the Social Icons section of the General Settings.
- Choose one of the given display options as per your desire.
- For the color option, you can either choose the official or default option.
The official option will allocate the icon’s color to the official color of the social media. The default option will allow you to choose your desired color for your social media icons.
- Choose the “Default option,” select the palette (at the right side of the customizer) after it appears below, and choose your color accordingly.

- Click on the publish button after you’ve saved your changes.