Customize easily with Editorial

For first timers, we’ve curated a list of links that will directly take you to respective articles, helping you to customize it efficiently. The links given here are some of the most important settings that are required for you to customize a better looking website.

Site Identity

One of the most important sections of the website. It is of great importance that you set it up first. It consist of the site’s title, tagline, logo, and siteicon

How to change your site’s identity?
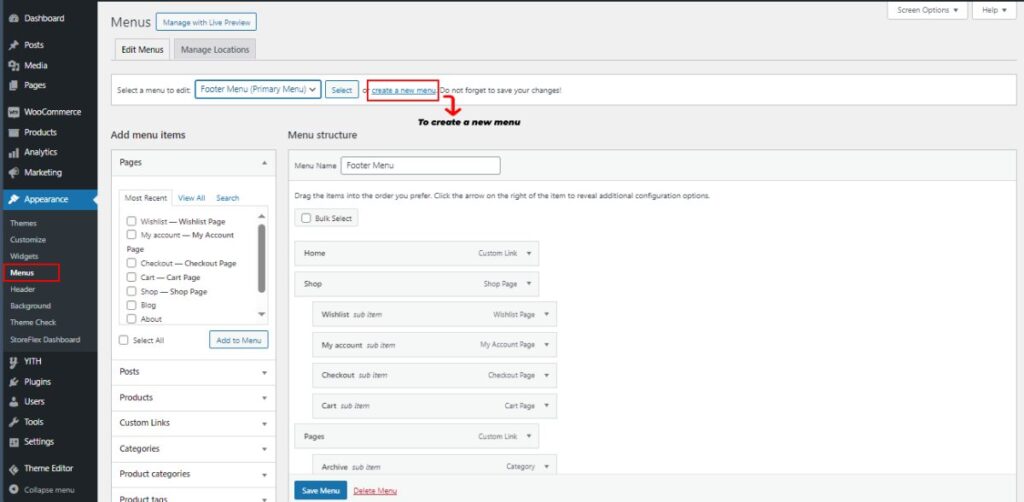
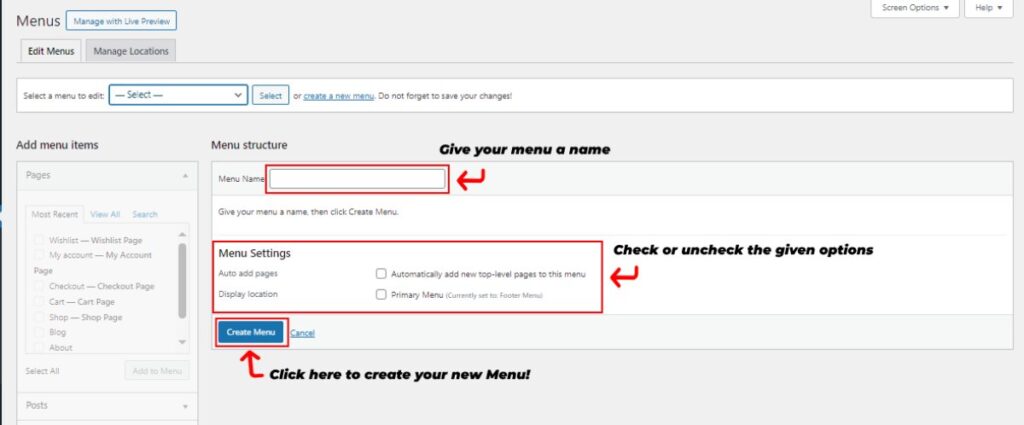
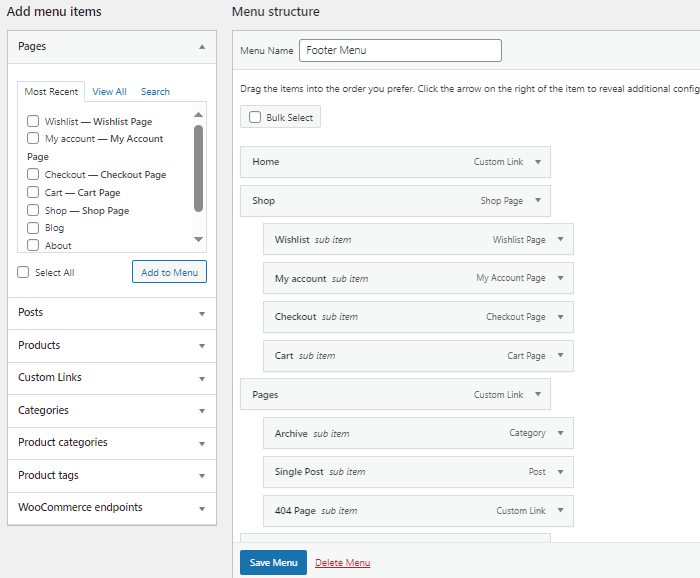
Menus

Menus are another important part of any website. They function as the navigational focal  point of the website. It is necessary for you to help direct your users through some important pages of your website.

How to configure your Menu’s settings?

Homepage Settings

The homepage is the first page of your website. It is very important that you keep the most prominent page as your homepage. This will help your users garner high-quality experience and can increase their engagement too.

How to configure your menu settings?

Colors and Typography

Colors and typography are other important factors on your website. Choosing the right color scheme that aligns with your brand. And furthermore, adjusting font styles is very important for enhancing the readability of your contents.

How to change the colors on your site?

How to change the typography on your site?

Header and Footers

Configuring the header layout allows you to position your logo prominently and create a user-friendly navigation menu. Customizing the footer lets you add functional widgets and personalize the copyright text, ensuring your website looks professional and aligns with your brand’s identity.

How to change the headers on your site?

How to change the footers on your site?

Please note that these are just the basics that you must customize to get started. You can learn more about our advanced customization features by exploring more of the Editorial’s documentation.

Access and Configure Menu Settings in Editorial

Menus are a very important part of any website. The menu provides your site with easy navigation options so that your users can easily surf around your website.

There are two simple ways to access and configure menu settings. You can either configure menu settings from the admin dashboard itself or from the theme customizer.

Configure menus using the WordPress admin dashboard itself!

Configuration of your site’s menu from the WordPress Dashboard is relatively easy. You just have to know a few steps to create a functional menu.

  • First, open your WordPress dashboard by logging in with your credentials.
  • Navigate to Appearance >> Menus from the sidebar.
  • Under the Edit Menus tab, click on Create a New Menu.
Menu Dashboard Setting-New Menu Image
  • Enter your menu name in the menu name input field.
  • Under Menu Settings, check one display location amongst the available locations.
  • Eventually, click on the Create Menu to save the changes and to be able to edit your new menu.
StoreFlex_ New Menu Creation

After you’ve created it, it’s time to add your elements to the menu.

  • After you’ve created your menu, go to Edit Menu at the top of the screen.
  • Then, select your preferred elements from the given options on the screen to either add pages, posts, categories, custom links, products, or any other given options to your menu.
Add Menu Elements
  • Save your changes by clicking on the Save Menu button.

If you want a more thorough menu tutorial, then check out the blog: How to easily add Navigation menus on WordPress websites?

Customize your menu settings using the theme customizer.

You can now manage your menu with the live preview from Editorial’s customizer. This will help you have more personalized, precise, and effectiveness-oriented customization of your menu.

To do so,

  • First, open your WordPress dashboard.
  • Open your theme customizer by navigating to Appearance > Customize.
  • Select the menu options to open the menu settings interface.
  • Click on the Create New Menu link to create a new menu.
  • Then, enter your menu name in the Menu Name Input field, and then set a location for that menu to either the primary header or the footer by checking one box.
  • Then, click on the next button below.
  • Click on Add Items under the Menu Name section.
  • You can then add menu items for your newly created menu from the array of options, which are Custom Links, Pages, Posts, Categories, and Tags.
  • Expand any of your preferred panels and click on the + icon to add them to the menu.
  • You can also reorder menus to create a drop-down effect by clicking on Re-order items. Use arrows to create a slight indentation for drop-down menus.
  • Click on Publish to save the changes.